Deploying Ottehr on Amazon Web Services (AWS)
Deploying Ottehr to AWS involves three steps:
- Set up your Ottehr environment, following the instructions in the Ottehr repository (opens in a new tab).
- Configure your local AWS profile for Ottehr and add it to your Ottehr config (opens in a new tab).
- Run the deploy script
If you want to experiment with Ottehr but don't want to deploy it, follow the steps in the Ottehr readme (opens in a new tab) to set it up on your computer.
Deploying
Set up your Ottehr Environment
Follow the instructions in the Ottehr repository (opens in a new tab) to set up your Ottehr environment. You will need to fill in all of the configuration files as described in the instructions.
For example, to deploy to the staging environment, you will need:
deploy/backend.config
deploy/staging.tfvars
packages/zambdas/.env/staging.json
You will add your AWS profile to the Ottehr configuration in the next step. AWS deploy also supports specifying domains for the Patient Portal and EHR CloudFront distributions, and certificate domains for looking up TLS certificates in ACM. See the AWS Variables (opens in a new tab) section in the Ottehr repository for more information.
Configure your local AWS profile
- If you do not have an AWS account, create one (opens in a new tab)
- Install the AWS CLI (opens in a new tab)
- Navigate to AWS IAM (opens in a new tab)
- Click
Usersin the left-hand menu - Click
Create User - Enter a name for the user and click
Next - Click
Attach policies directly - Search for
AdministratorAccess, select it, clickNext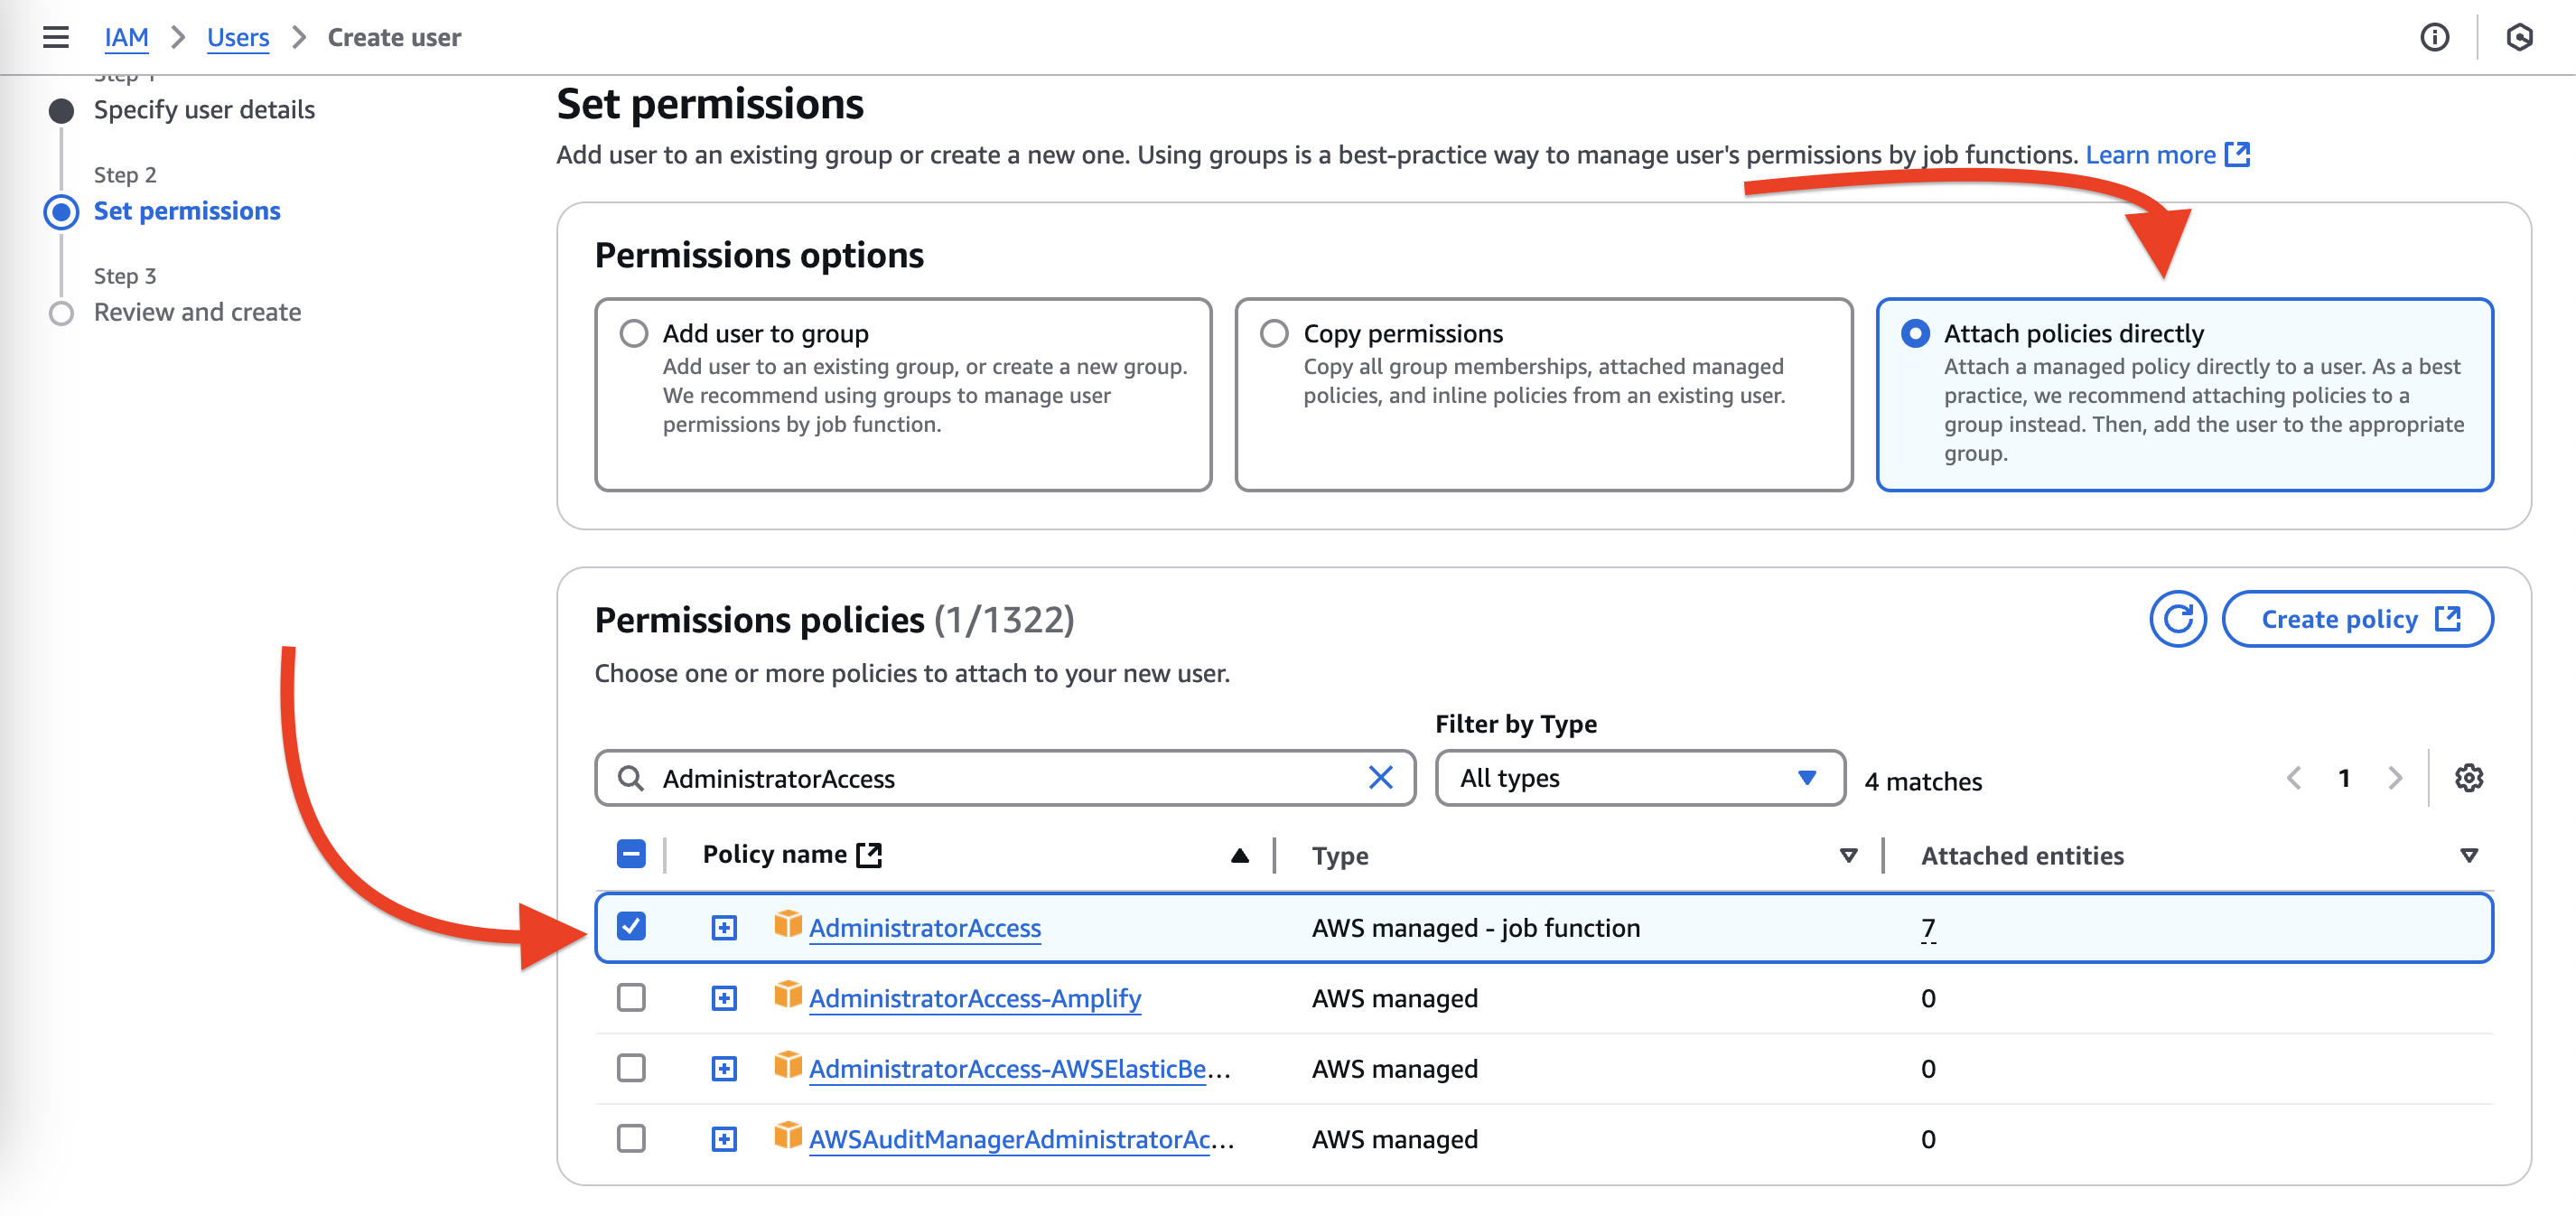
- Click
Create user - Click the user name to choose the user
- Click
Create access key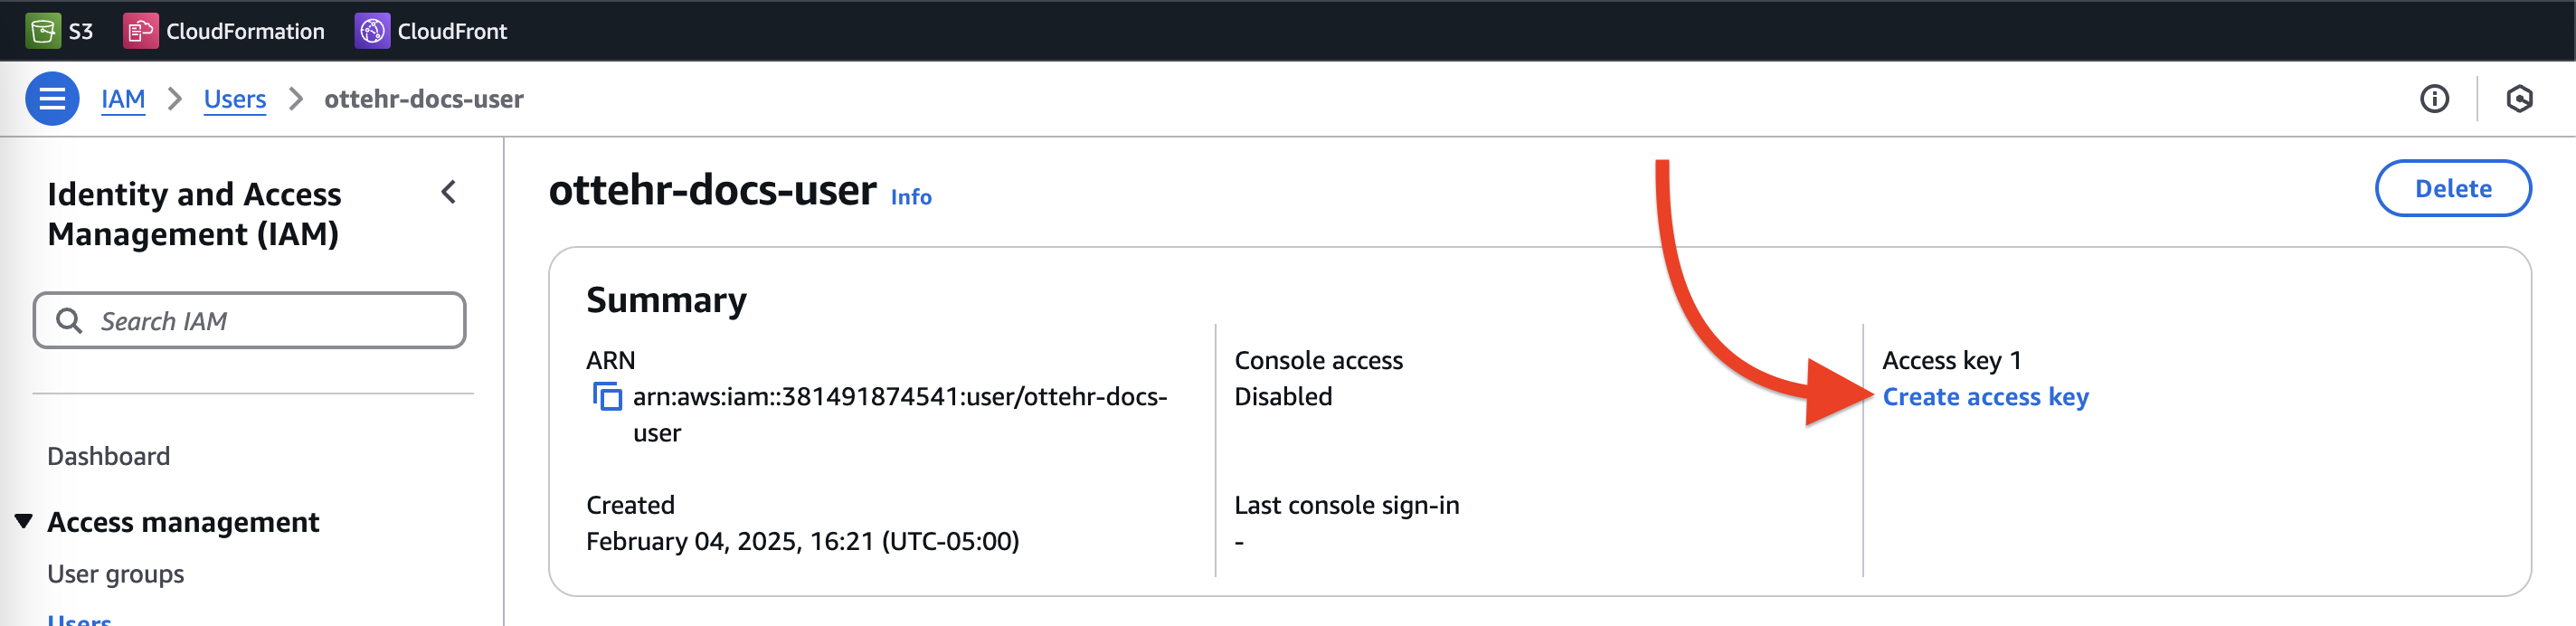
- Click
Command Line Interface (CLI), Check the "I understand" box, clickNext
- Click
Create access key - Save the
Access key IDandSecret access keyin a secure location - Run the following command in your terminal to configure your
ottehrAWS profile:
aws configure --profile ottehrEnter the Access key ID and Secret access key when prompted. For default region name and default output format, press Enter key.
Add your AWS profile to the Ottehr configuration. For example, for a staging environment:
# In deploy/staging.tfvars
aws_profile = "ottehr"
Run the deploy script
There are npm scripts for common environments included in the Ottehr repository. For example, to deploy to the staging environment, run:
# From deploy/ directory
npm run apply-staging
The script will take about 15 minutes to run and will deploy Ottehr to your AWS account.