Setting up Claims and Payments for Ottehr
Ottehr integrates directly with Stripe for payment processing and Candid for insurance claim management. It is designed to function independently with only Stripe, supporting self-pay payments, only Candid, supporting insurance claim submissions, and supporting both.
Configuring Stripe
Ottehr is built to work with a Stripe account. Stripe has a very good guide (opens in a new tab) for creating and managing your Stripe account. In order to get your account to a fully functional state, you may need to provide details, like your Tax ID and supporting IRS documentation, government IDs for principals of your business, business address and bank account information. Separately, you will need to become familiar with Stripe test mode (opens in a new tab).
Configuring Ottehr to Use Stripe
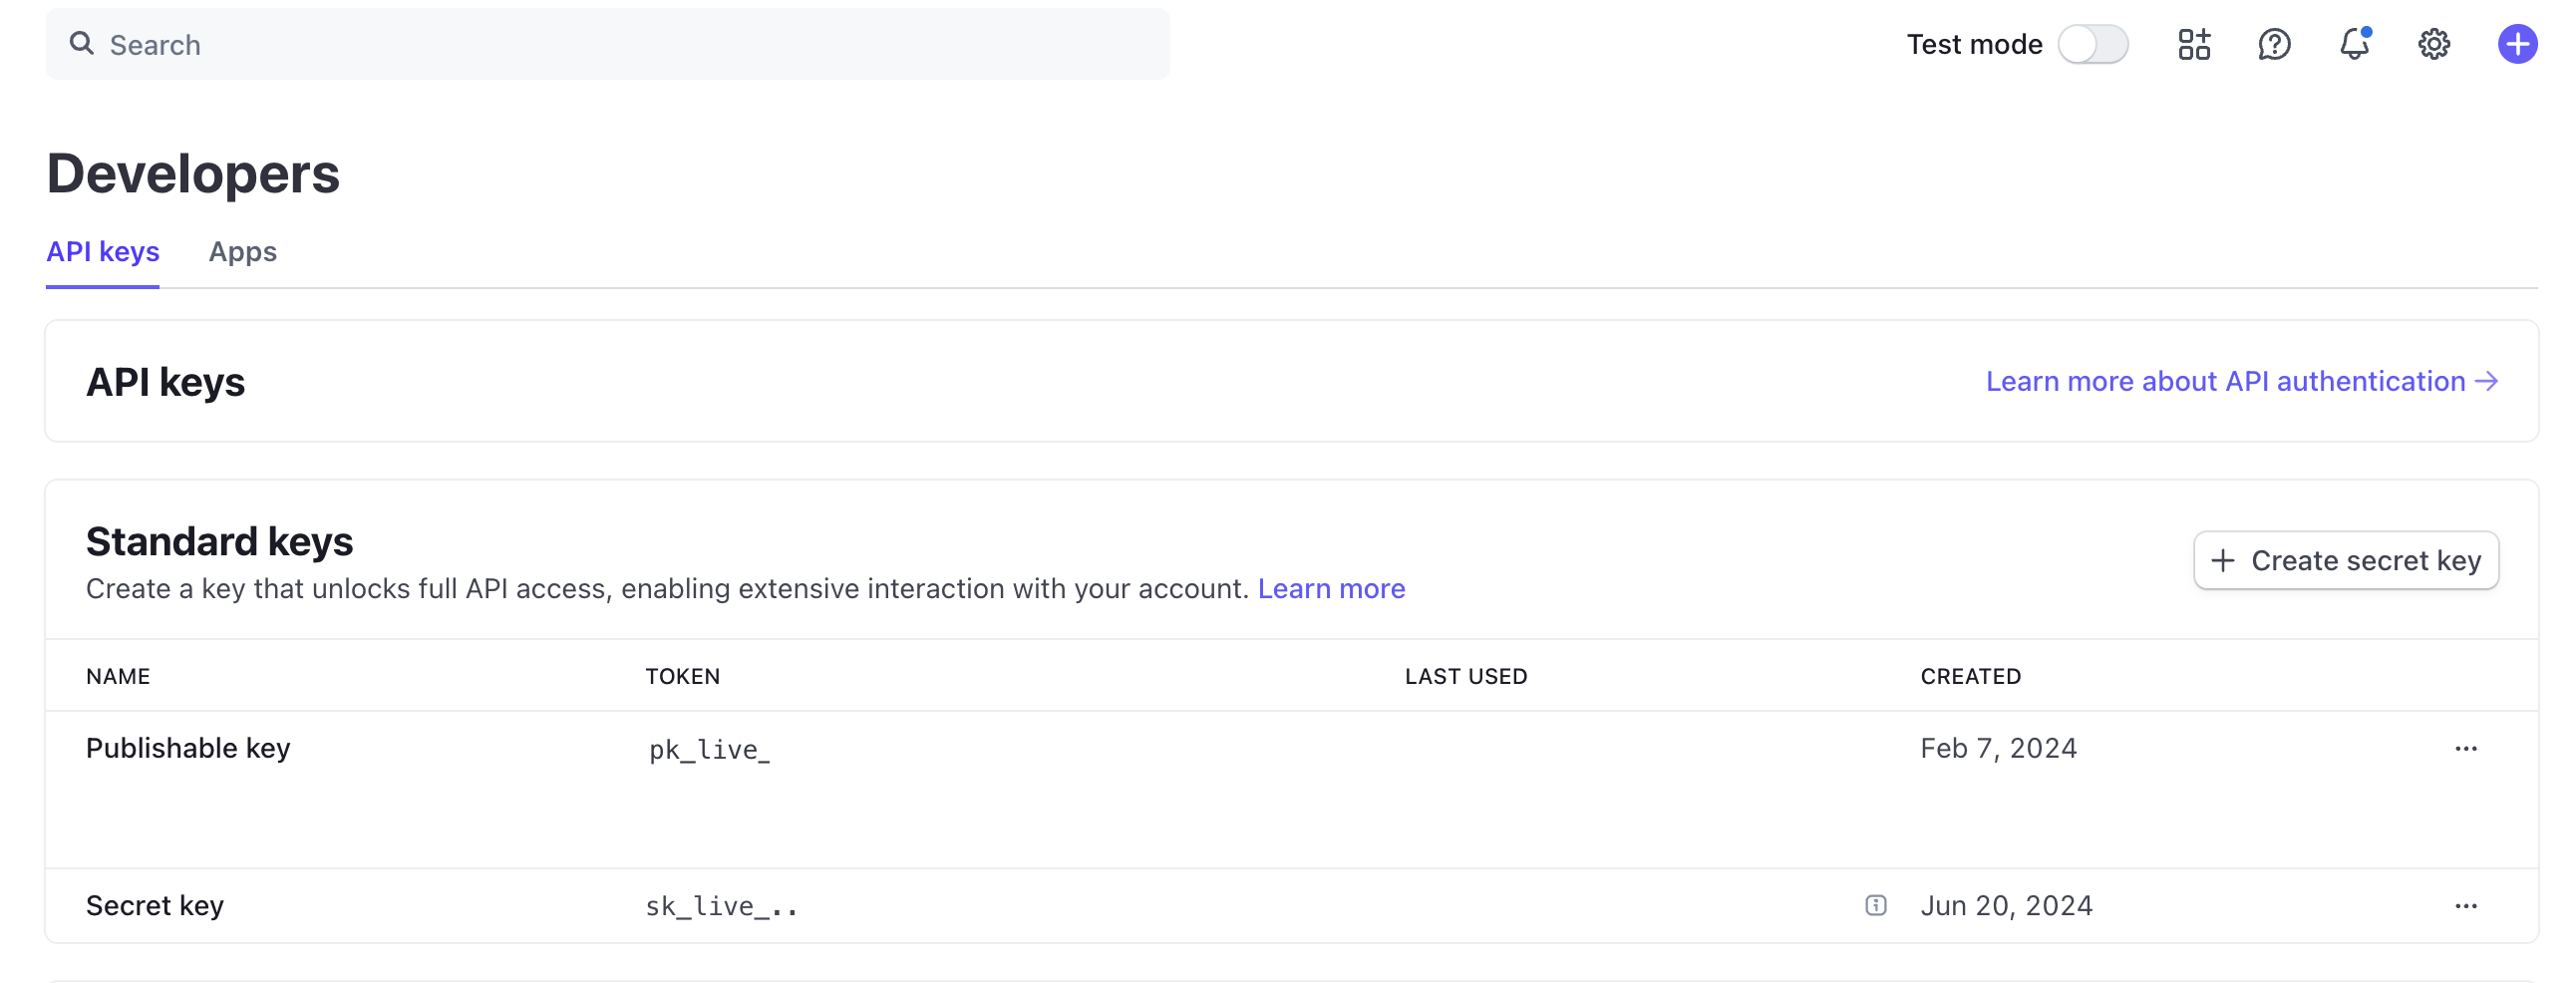
To configure Ottehr to use Stripe, you will first need to create Stripe API keys (opens in a new tab) for your organization in both Live and Test mode (opens in a new tab).
Each deployed environment of Ottehr will require its own set of keys and secrets. For stripe, we recommend using test keys in your lower environments and live keys in your production environments. You will need STRIPE_PUBLISHED_KEY and STRIPE_SECRET_KEY in each of your zambda configurations and a VITE_APP_STRIPE_KEY published key for both of your patient and provider EHR apps.
Stripe prefixes their keys with a type, e.g. pk_ and sk_ for published and secret, respectively, as well as live_ and test_ for production and lowers.
STRIPE_PUBLISHED_KEY=pk_live_51************XX
STRIPE_SECRET_KEY=sk_live_71************XXVITE_APP_STRIPE_KEY=pk_live_51************XXConfiguring Candid
The first step in configuring Candid is submitting a request to our team to create your Candid account. Join our Slack (opens in a new tab) or send an email to our Support team to start this process. Once created, your account owner will invite and manage other billers on your team. You will need to provide us with information about your business, such as a tax ID, supporting IRS documentation, and government IDs for principals of your business. You will have two independent Candid environments, one for your sandbox project in the Candid staging environment (opens in a new tab), and one for your production project in the Candid production environment (opens in a new tab). Of course, your Oystehr sandbox project would be used in conjunction with staging and live project would be used in conjunction with Candid production.
Configuration vs. Operation
There are two sets of data flowing into Candid. Some data, like information about individual patients, claims, remittances, tasks, and reports, is considered operations data and is dynamic. It is generated by Ottehr as providers see patients, collect and document clinical information, diagnose the problem, and perform procedures, and sent to Candid on completion of a visit. The other set of data, information about insurances, negotiated fee schedules, general pricing details, contracts, and providers, has to pre-configured before a claim can successfully flow through Candid's rules engine to a payer. Configuration data is managed in Candid.
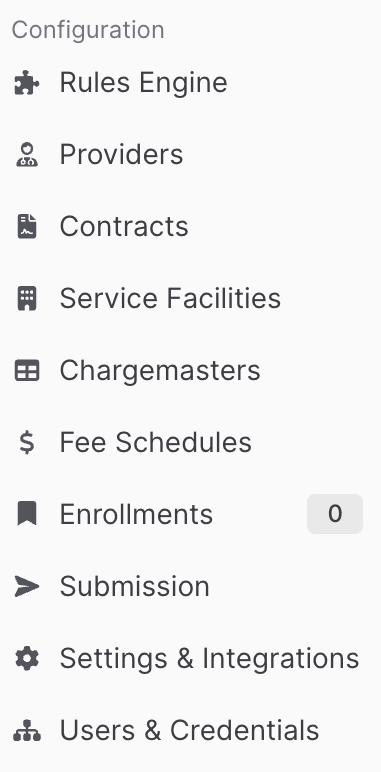
Candid Configuration Menu
Configuring Billing Providers and Rendering Providers
Note: Candid documentation requires a credentialed Candid account. Please, contact Oystehr support team for access.
In order for your Ottehr EHR to manage its revenue cycle, information about who is rendering and who is billing for the service has to be configured in Candid as providers. Both your clinical organizations as well as your practitioners will have to be configured either as Organization Providers (opens in a new tab) or as Individual Providers (opens in a new tab). A provider in candid can be designated as either a billing provider or a rendering provider, or both. A billing provider must have a valid tax ID.
Candid provides a useful UI to enter provider data, but for a larger organization a bulk import (opens in a new tab) may be easier. An example CSV is available here.

Enrolling Your Payers
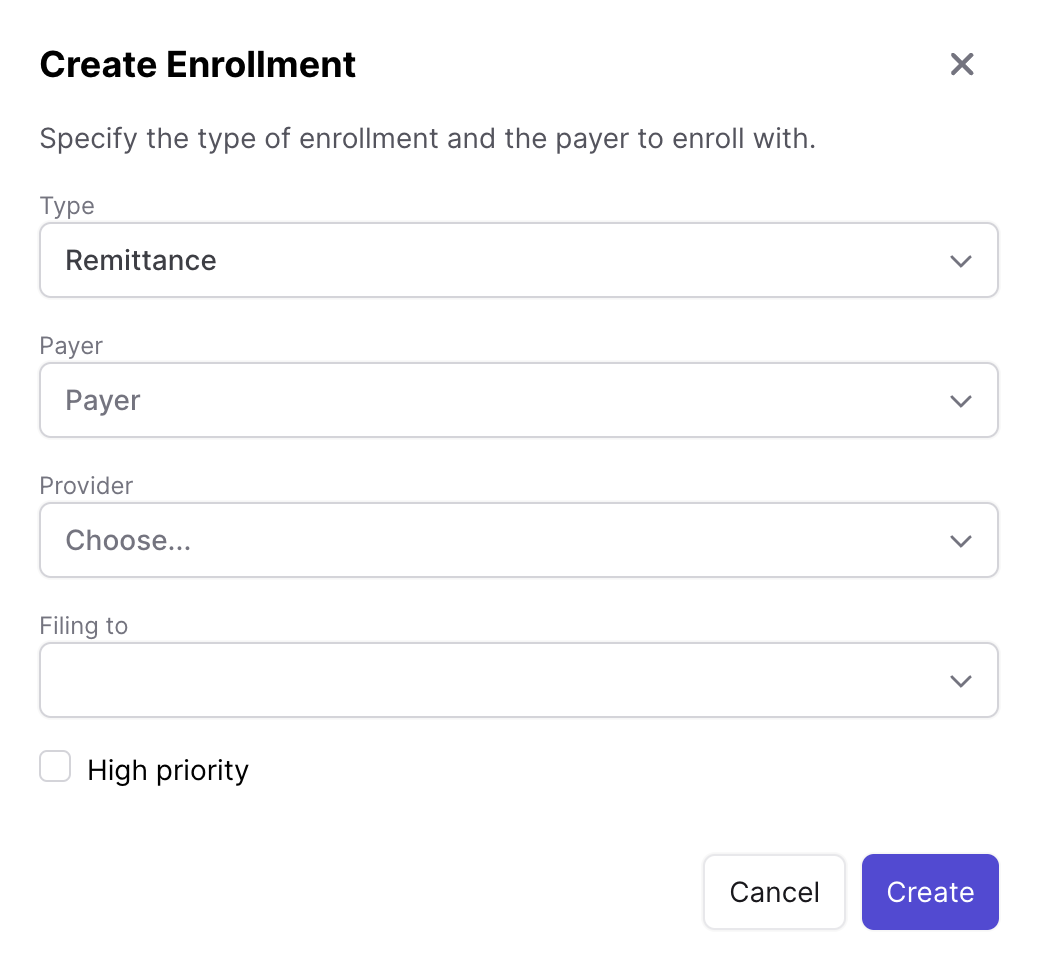
Once you have configured at least one billing provider, you can request (opens in a new tab) an electronic data interchange (EDI) enrollment with your payer. The enrollment process will enable you to bill each insurance provider for services performed. Candid has a nice overview of EDI Enrollments (opens in a new tab). After you request enrollments from a payer, you can begin configuring the rest of your revenue cycle process.
Candid Payer Enrollment
Configuring Charge Masters and Fee Schedules
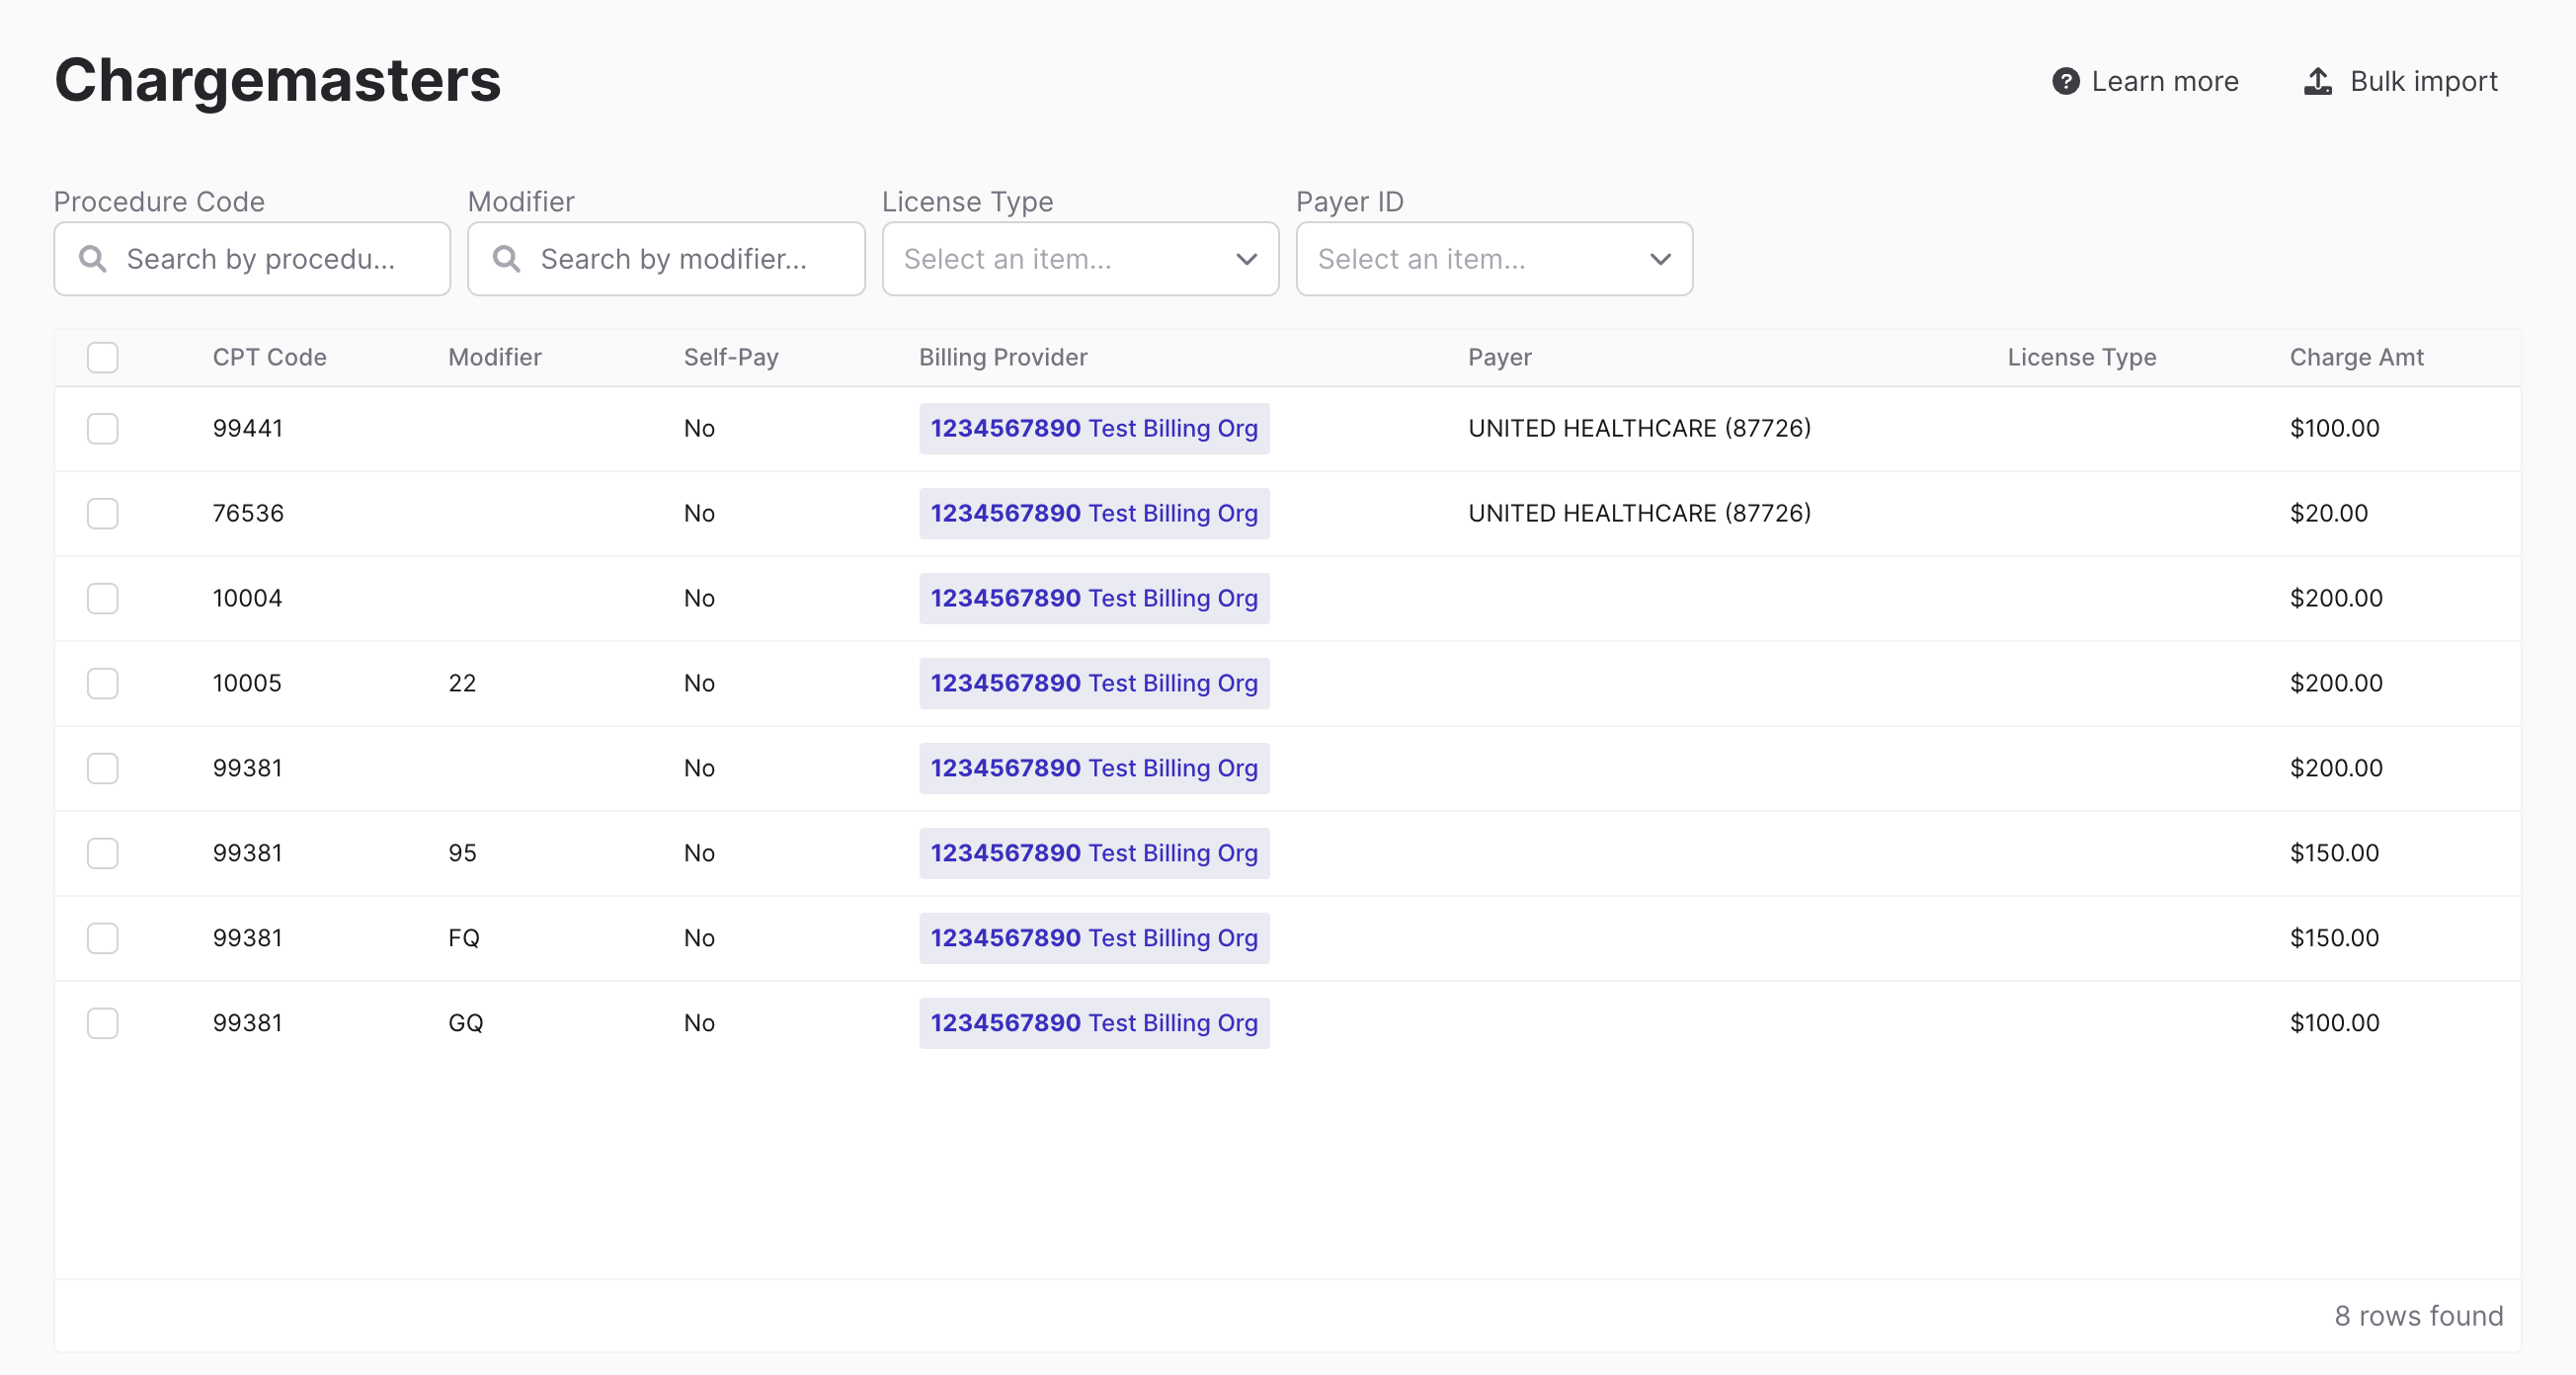
Before you can start the revenue cycle, you must first create a charge master which would outline the prices for your services based on procedure codes, modifiers, etc. Take a look at the Candid docs for an overview on charge master setup (opens in a new tab). We also provide an example you can use with Candid's bulk import feature to get started.
Candid Charge Master Example
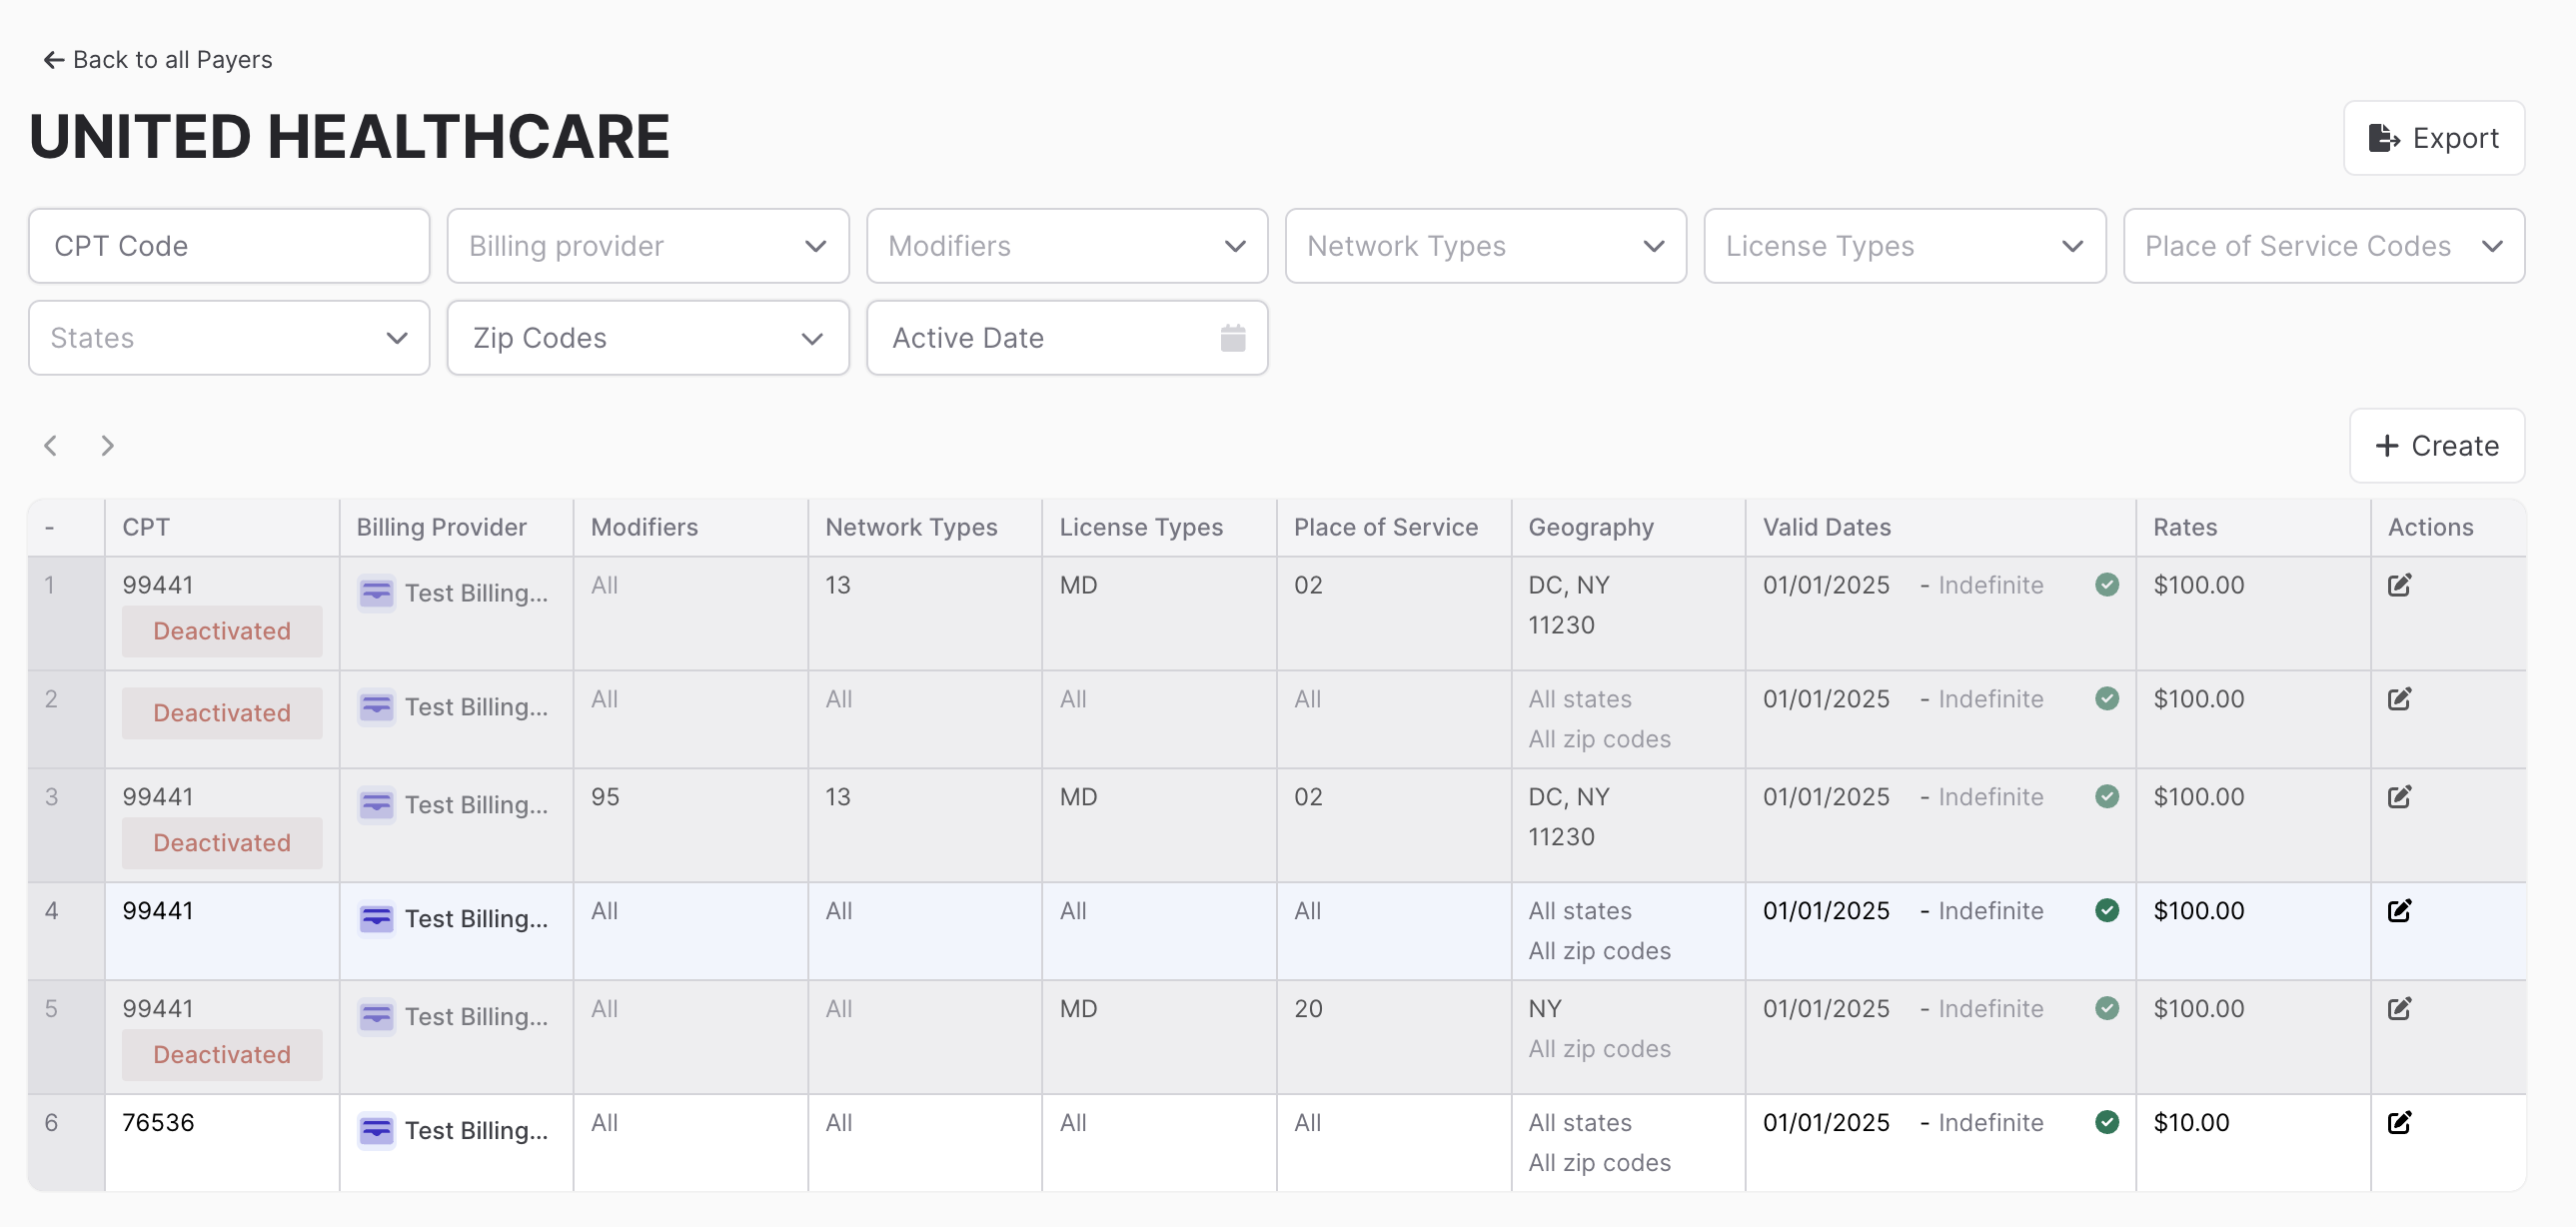
Once you have the charge master and enrolled payers, you need to configure a fee schedule for each payer. The fee schedule contains details about negotiated rates. Candid has an overview of fee schedule configurations (opens in a new tab), and it may be useful to get started with this example by importing your fee schedules in bulk for each payer, and updating later as needed.
Candid Fee Schedule Example
Configuring Contracts
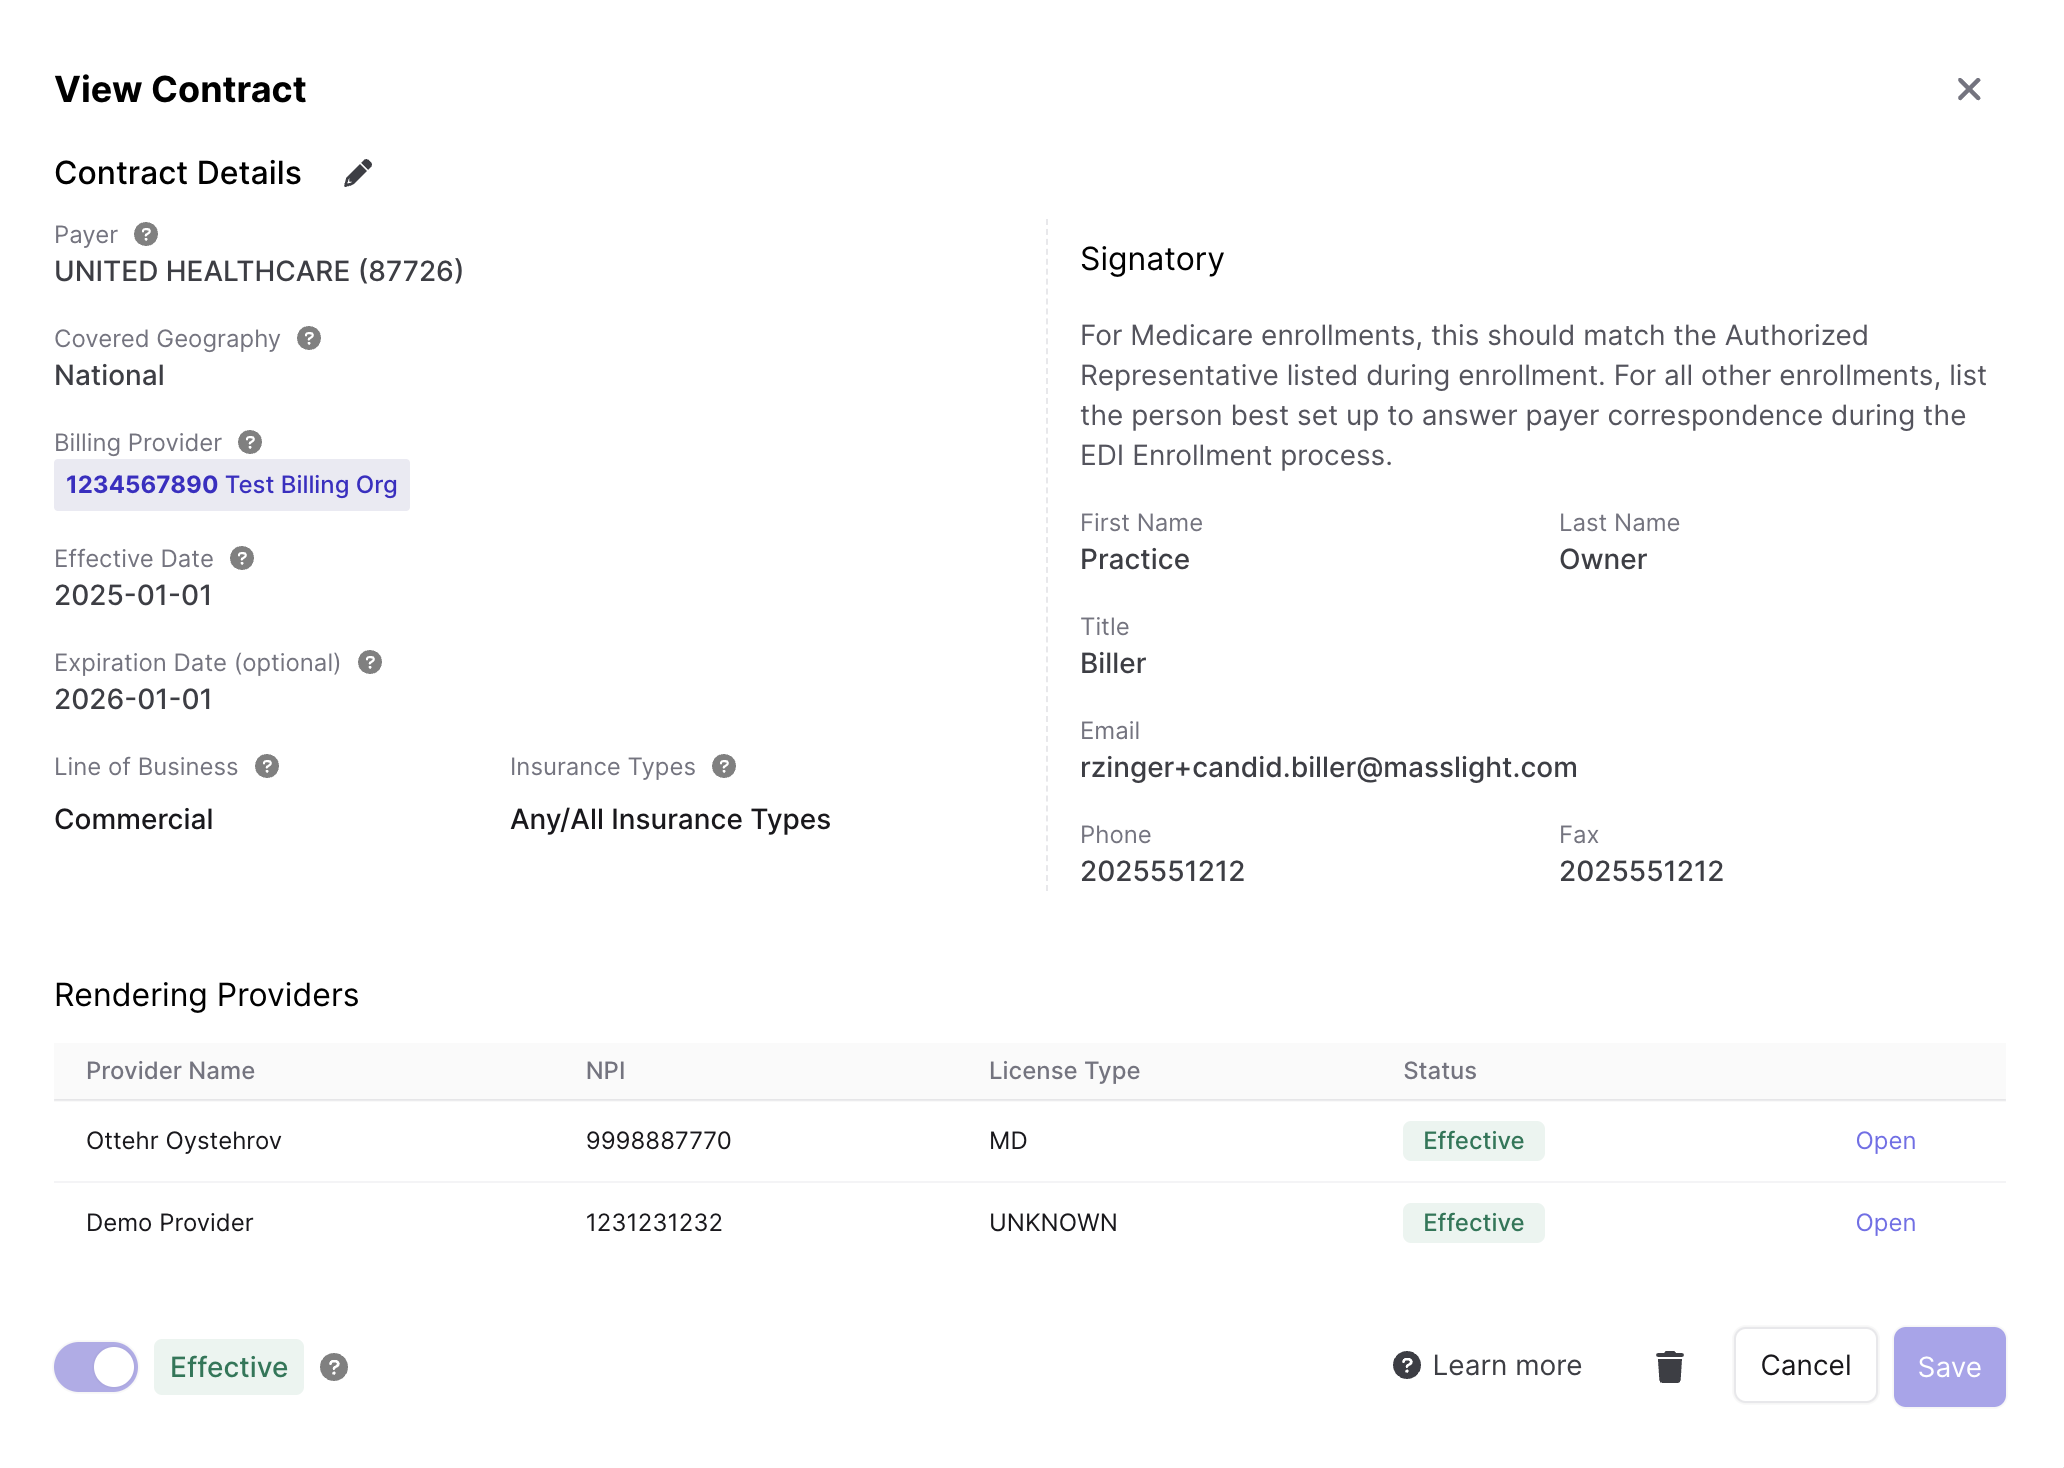
Once you have your providers, billers, per-payer charge masters, and fee schedules you are able to connect them together with contracts. You can configure a contract one by one, as described by this individual contract configuration guide (opens in a new tab). You can also update contract details in bulk (opens in a new tab). Here is an example template to get started.
Candid Contract Example
Configuring Ottehr to Use Candid
Ottehr configuration with Candid is simple: you need to supply client credentials and the Candid environment (SANDBOX or PROD). Add the following keys to the zambda environment configuration in packages/zambdas/.env/environment.json (opens in a new tab)
CANDID_CLIENT_ID=xyz***************XXX
CANDID_CLIENT_SECRET=abc***************XXX
CANDID_ENV=SANDBOX
Configuring Candid Integration with Stripe
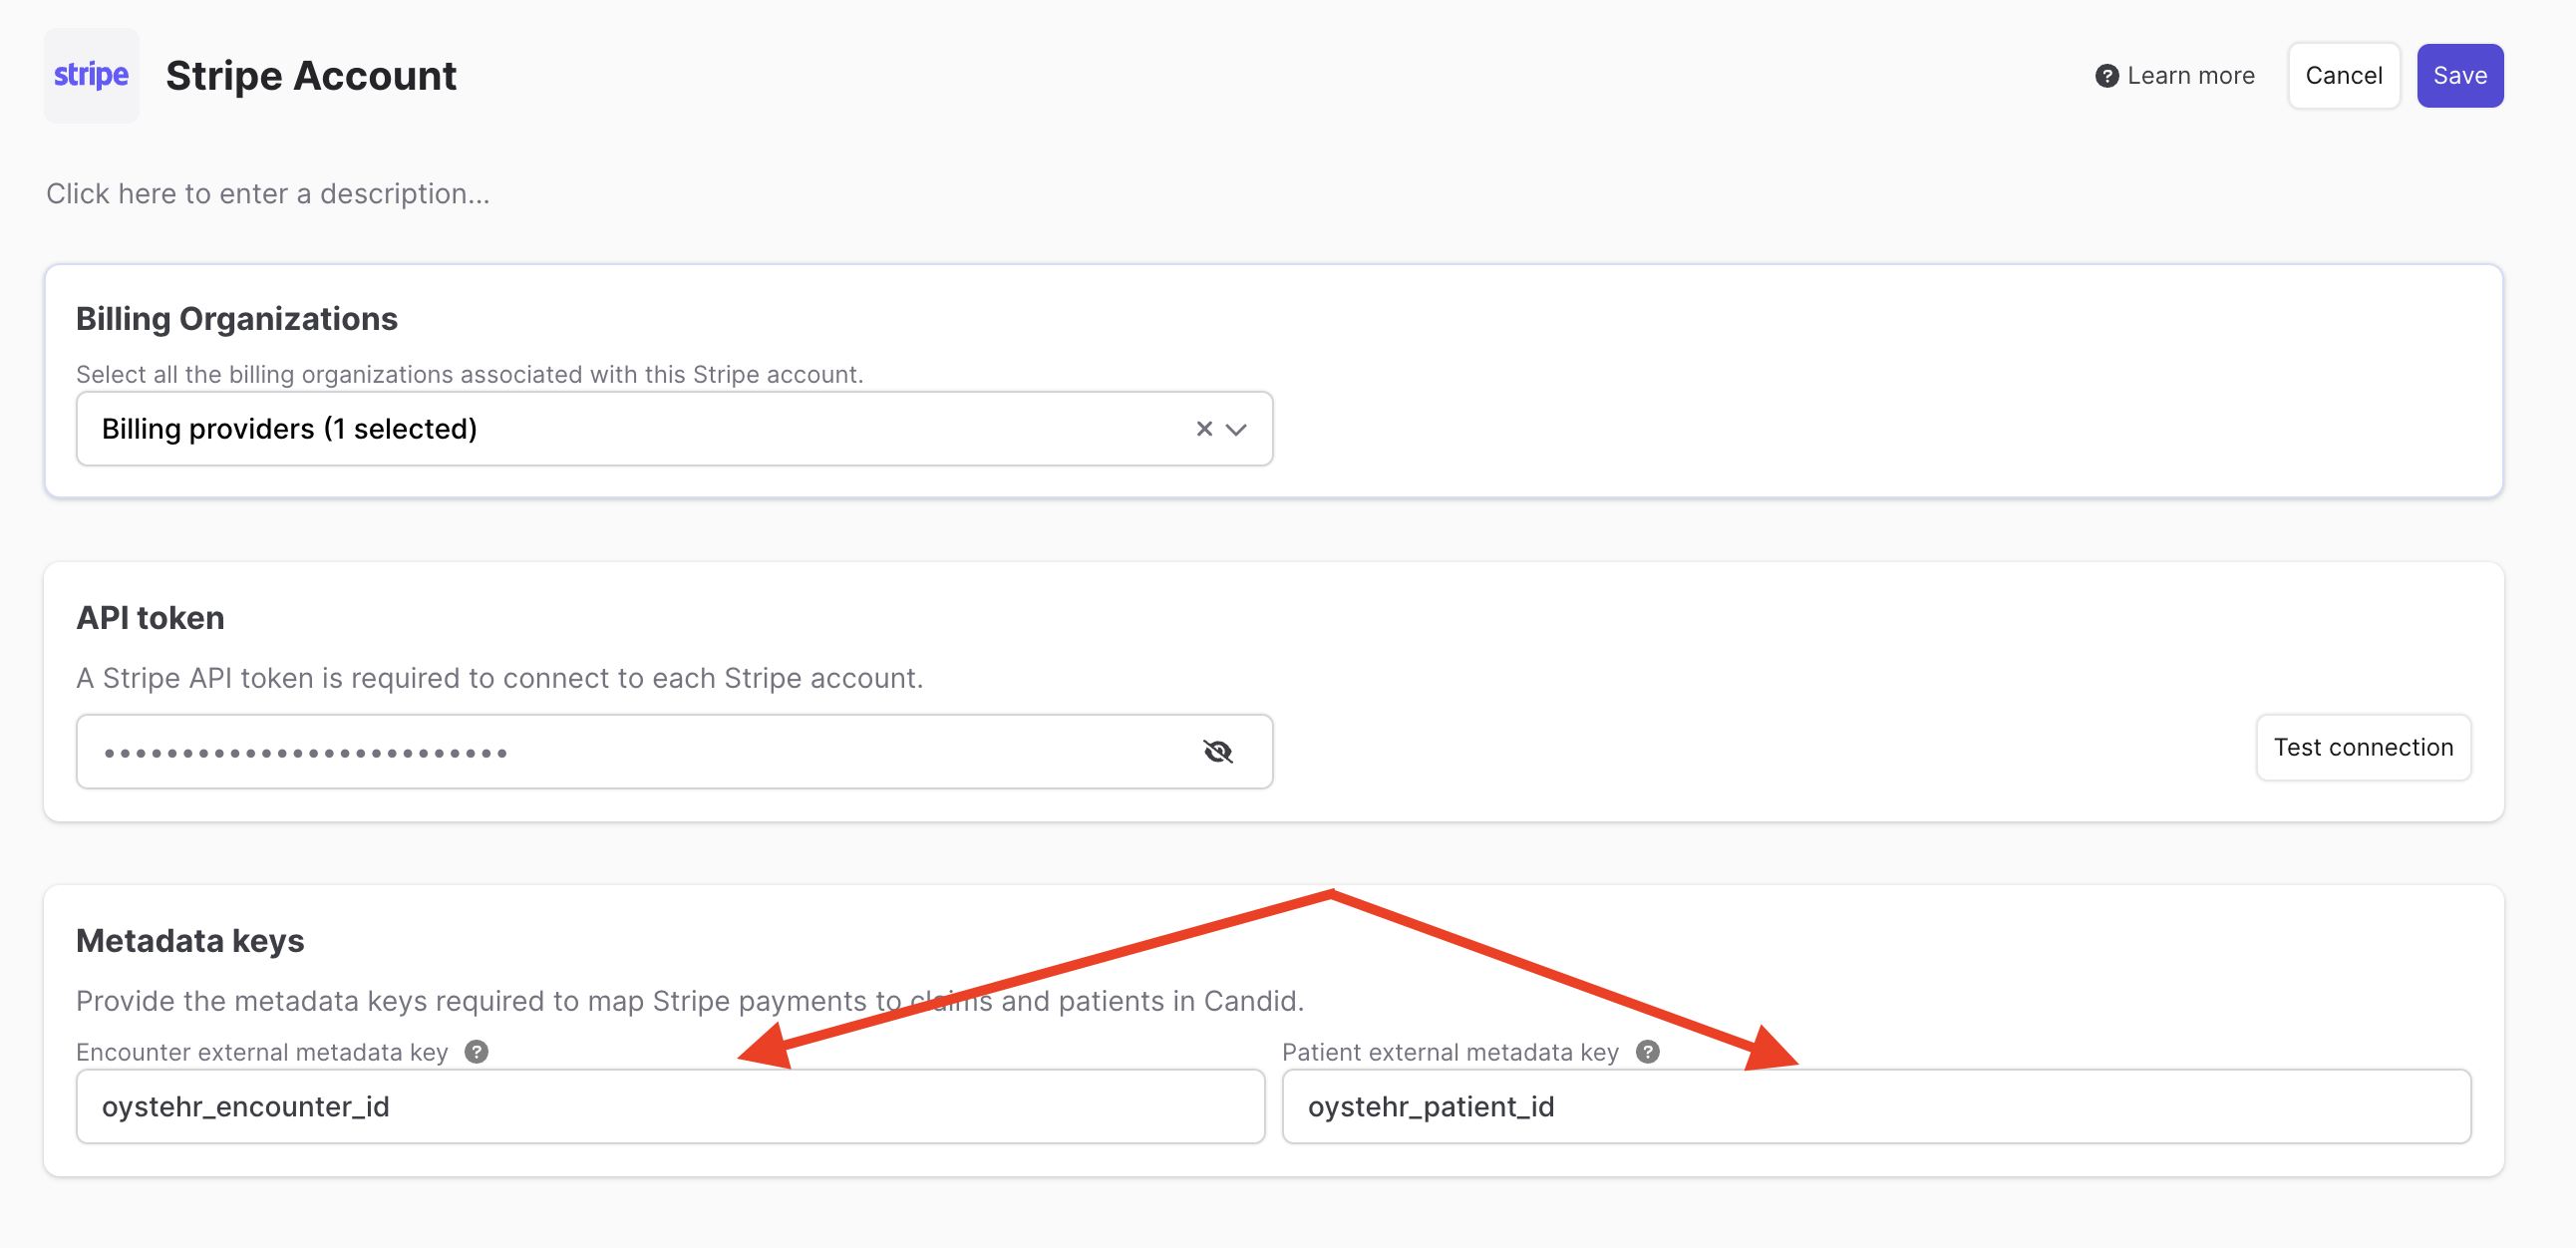
Candid can perform direct invoicing of patients via your existing Stripe account. In order to do that, add a new Stripe integration as described in Candid-Stripe setup documentation (opens in a new tab).
When adding the Stripe integration to Candid, you need to set the metadata keys to match those created by Oystehr. The encounter ID should be oystehr_encounter_id and the patient ID should be oystehr_patient_id.