M2M Clients
When there is a person needing to invoke Oystehr APIs, they can authenticate as either a Developer or User to get an access token. Machine to Machine Clients (M2M Clients) on the other hand, are used to access Oystehr APIs from scripts and server-side code like Zambda Functions.
M2M Clients use the OAuth 2.0 Client Credentials flow (opens in a new tab) to authenticate. You send the M2M Client's Client ID and Client Secret to the https://auth.zapehr.com/oauth/token (opens in a new tab) endpoint and it responds with an access token you can use to call Oystehr APIs.
Getting your M2M Client's ID and Secret
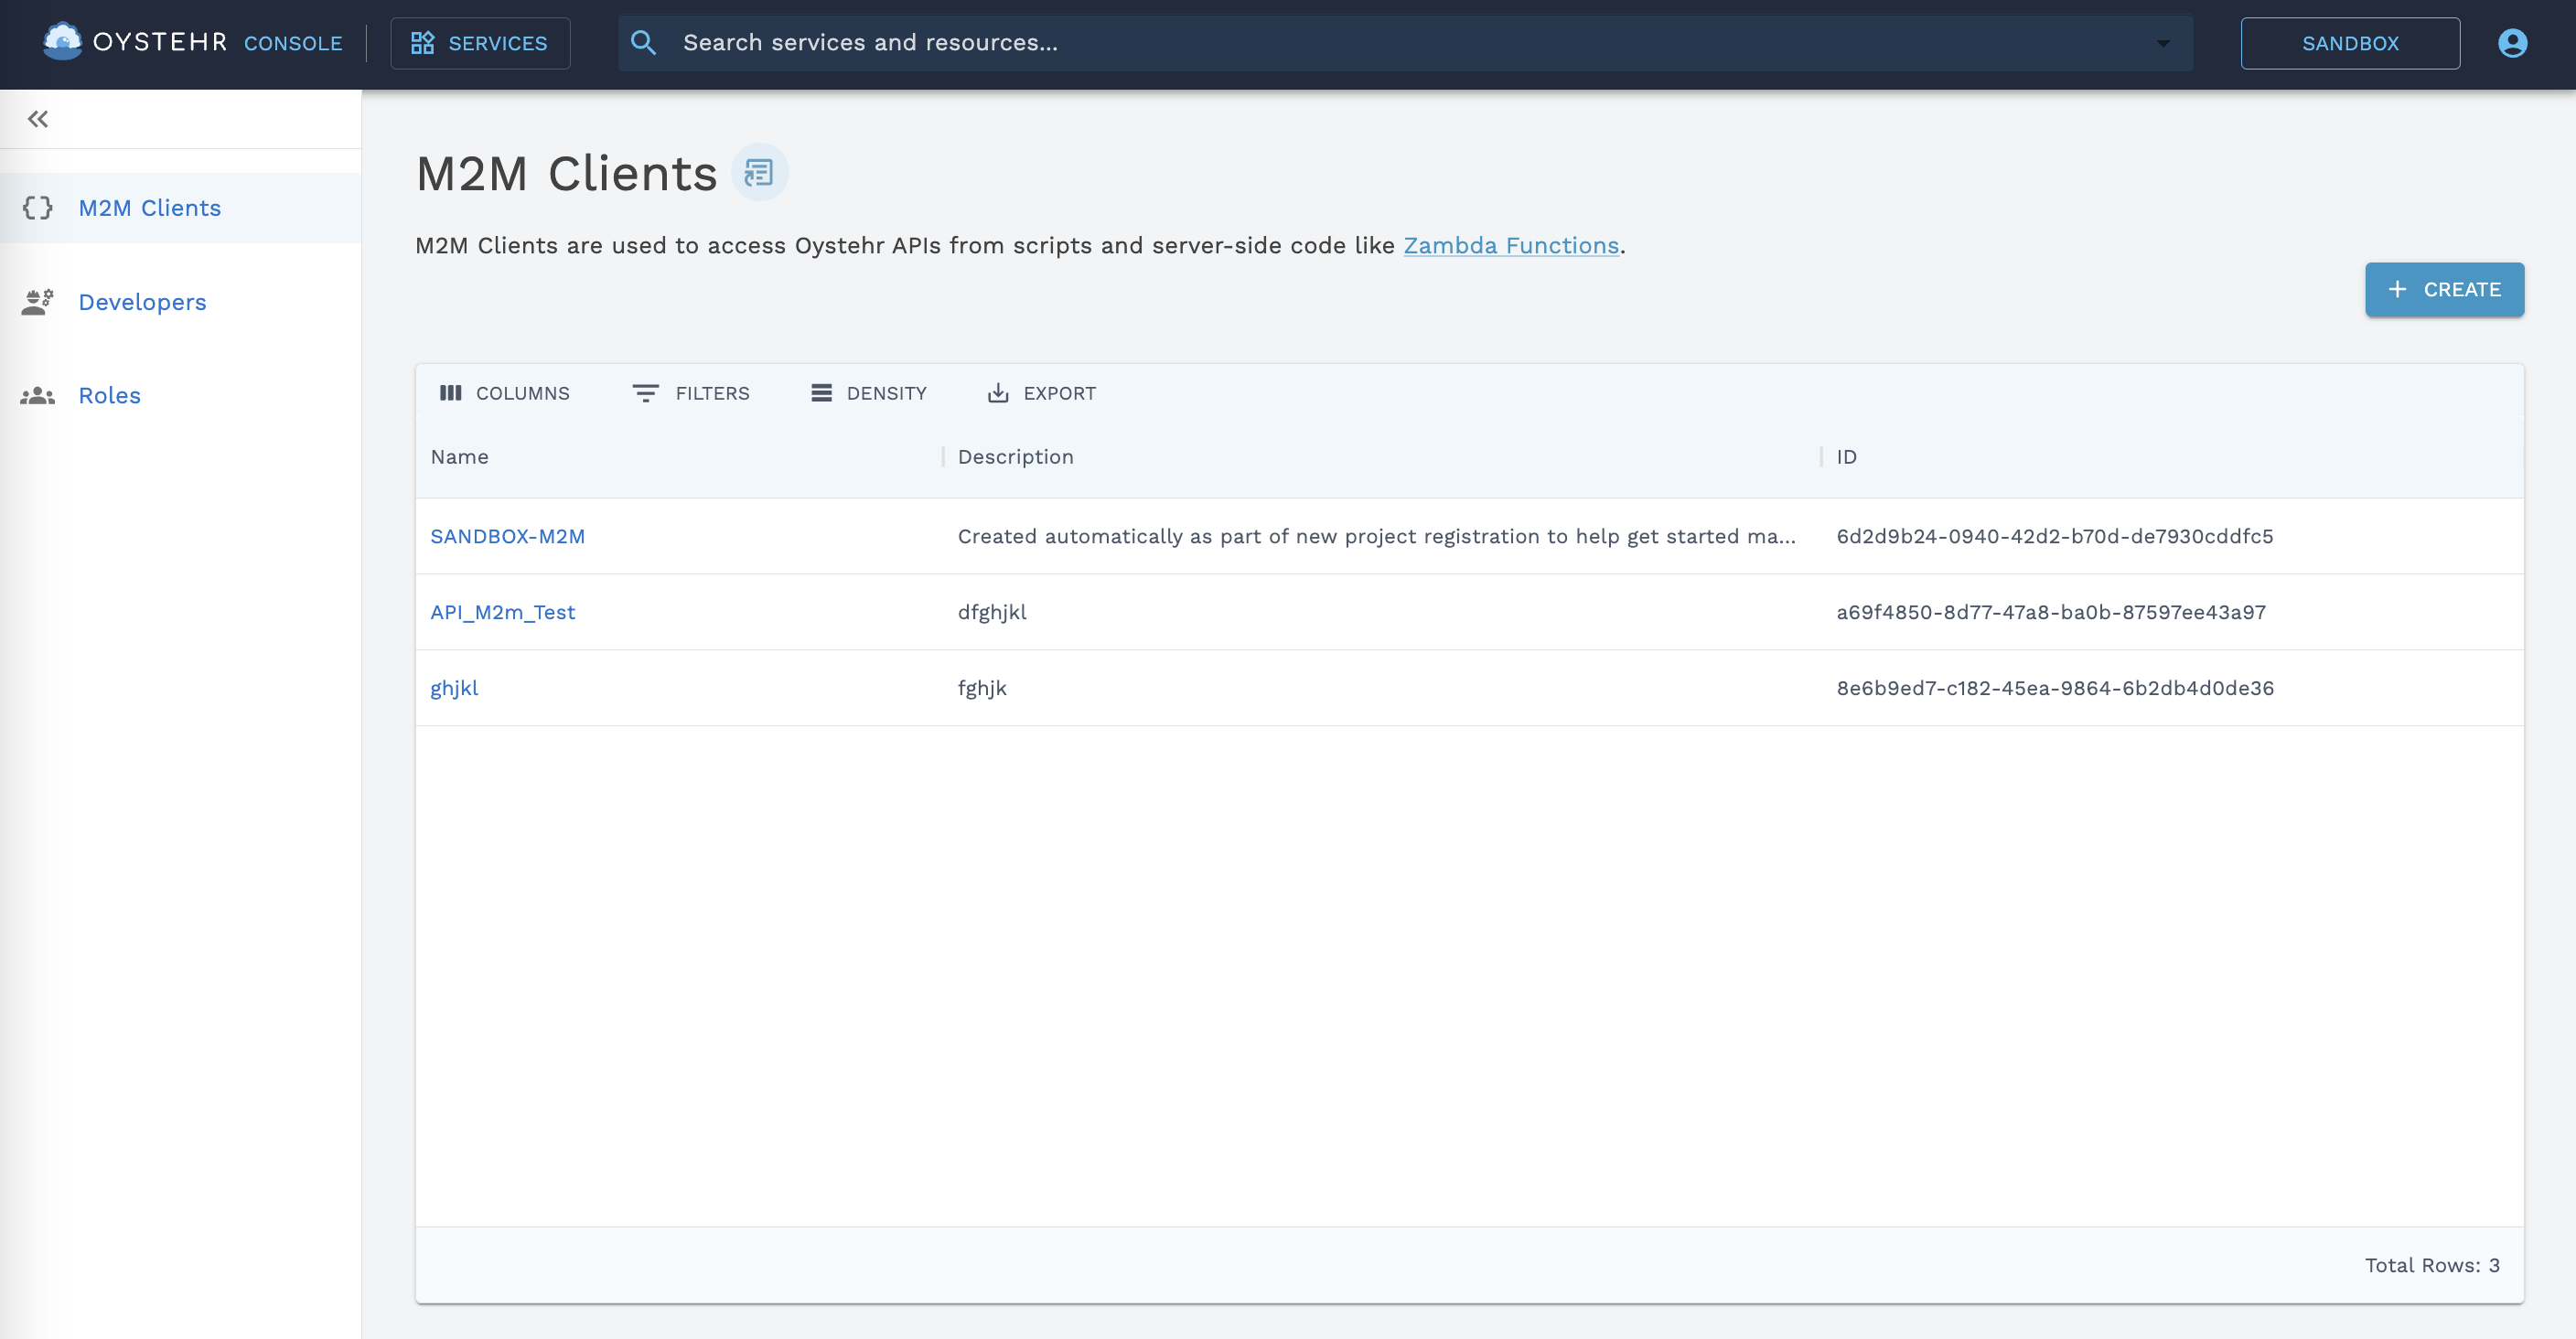
When your Oystehr Project is created, a default M2M Client is created for you automatically. You can find the default M2M Client on the Oystehr Developer Console's M2M Clients Page (opens in a new tab).
M2M Clients in the Developer Console

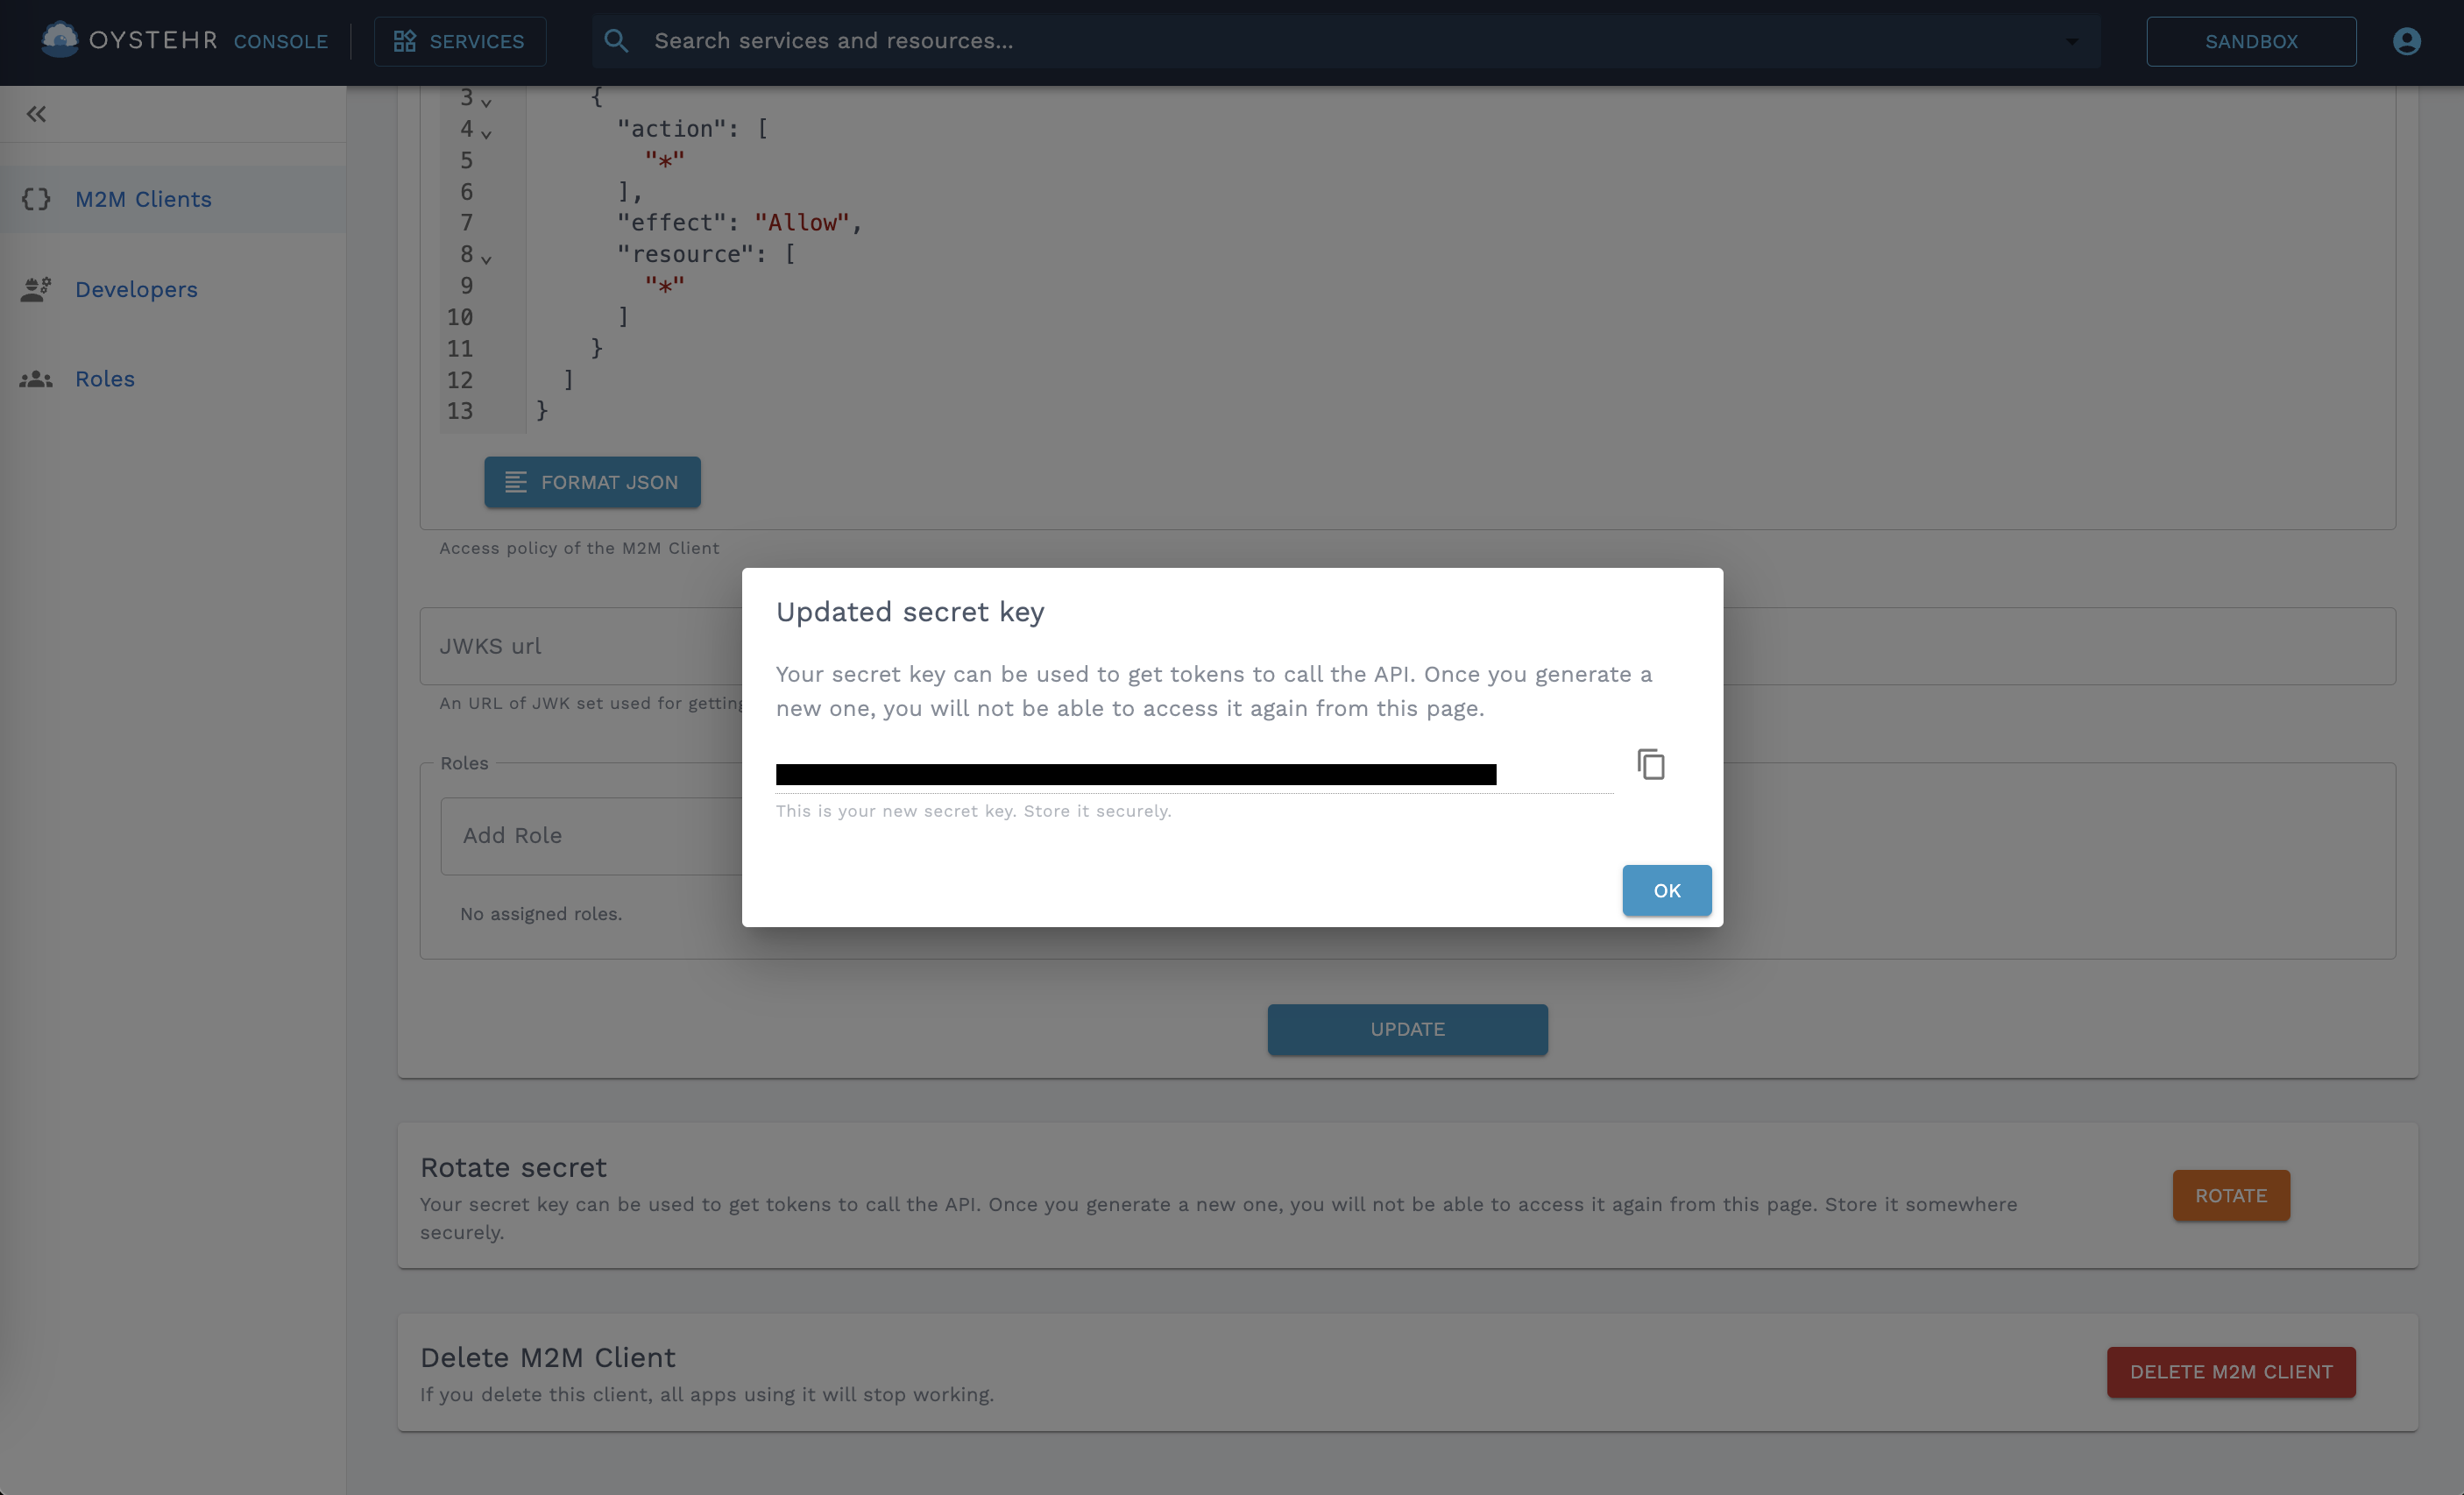
The M2M Client's ID is can be copied from the list or details screens. To get the Client Secret, you will need to rotate the client secret from the details screen.
Rotate M2M Client Secret in the Developer Console

The Client Secret is shown only once after rotation so make sure to hang onto it, storing it somewhere secure. If you lose the Client Secret, you can rotate the secret again, but be aware that the old secret will be invalidated, so you will need to immediately update any scripts depending on the old one.
Get an Access Token
To get an access token, send a POST request to https://auth.zapehr.com/oauth/token (opens in a new tab) with the M2M Client's Client ID and Client Secret in the request body.
const jsonResponse = await (await fetch('https://auth.zapehr.com/oauth/token', {
  method: 'POST',
  headers: {
    'content-type': 'application/json',
  },
  body: JSON.stringify({
    grant_type: 'client_credentials',
    client_id: '<your_m2m_client_id>',
    client_secret: '<your_m2m_client_secret>',
    audience: 'https://api.zapehr.com',
  }),
})).json();

console.log(`access token: ${jsonResponse.access_token}`);
Use this access token to call Oystehr's APIs by instantiating the Oystehr SDK with the access token or by including the access token in the Authorization header. For examples, take a look at FHIR API Basics.
Grant Permissions to M2M Clients
When creating or updating an M2M Client, you can set its permissions with an inline Access Policy, Roles, or both:
import Oystehr from '@oystehr/sdk';

const oystehr = new Oystehr({
  accessToken: "<your_access_token>",
});

const updatedM2m = await oystehr.m2m.update({
  id: '23357fe8-3368-484d-a040-a6e672d59de1',
  name: 'SuperAdminM2M',
  description: 'M2M Client with super admin permissions from a role',
  accessPolicy: {
    rule: [],
  },
  roles: ['3dda3a95-5aad-4e28-aabb-86a161324d5c'],
});
The inline access policy applies only to the individual M2M Client. Roles on the other hand make access policies that are reusable and that can be assigned to any number of M2M Clients, Developers, or Users. Learn more about roles.
Grant Permission to Act on M2M Clients
In order for actors to be allowed to act on M2M Clients, they must be assigned an access policy with appropriate permissions.
Examples
Here are some examples of access policies you can use to grant permissions to act on M2M Clients.
{
  "rule": [
    {
      "action": "*",
      "resource": "IAM:M2MClient:*",
      "effect": "Allow"
    }
  ]
}{
"rule": [
{
"action": ["IAM:ListAllM2MClients", "IAM:GetM2MClient"],
"resource": "IAM:M2MClient:*",
"effect": "Allow"
}
]
}You might give this access policy to all Users, M2M Clients, and most Developers, so that they can't take these sensitive destructive actions. Before deleting an M2M Client or rotating its secret, you typically want to have replaced the M2M Client anywhere it's used with another one so that nothing breaks:
{
  "rule": [
    {
      "action": ["IAM:DeleteM2MClient", "IAM:RotateM2MClientSecret"],
      "resource": "IAM:M2MClient:*",
      "effect": "Deny"
    }
  ]
}
Explicit deny rules take precedence over allow rules. This is helpful when you need to override accidentally gets an access policy assigned with an allow rule for these actions, the explicit deny rule will prevent them from taking the action.
Actions
The following table details the different actions which grant permission to interact with M2M Client resources.
| Service | Action | Resource Type | Description | Minimum Scope | Dependency |
|---|---|---|---|---|---|
| IAM | CreateM2MClient | M2MClient | Grants permission to create a new M2M user within the principal project | * | |
| IAM | GetM2MClient | M2MClient | Grants permission to view details of an M2M user | ||
| IAM | UpdateM2MClient | M2MClient | Grants permission to update an M2M user | ||
| IAM | DeleteM2MClient | M2MClient | Grants permission to delete an M2M user from the principal project | ||
| IAM | ListAllM2MClients | M2MClient | Grants permission to retrieve a list of M2M users within the principal project | * | |
| IAM | RotateM2MClientSecret | M2MClient | Grants permission to rotate the auth secret associated with an M2M user |